
Choosing a Paper Box Glue Spraying Machine in 2026 requires more than comparing prices and advertised speeds. The right decision begins with your boxes, adhesive, production rhythm, and operators. A small carton may need a narrow, precise spray pattern. A heavier folding box may require stronger coverage and steadier pressure. Paper thickness matters. So does humidity.
Packaging machinery specialist Elena Morris offers a practical reminder: “A machine is only as good as its glue control.” That idea deserves attention. Uneven glue can create lifted edges, wet spots, warped paper, and costly rework. During evaluation, ask suppliers to demonstrate your actual box samples. Watch the nozzle as it starts and stops. Check whether glue reaches corners without flooding the surface.
Look closely at pump accuracy, nozzle cleaning, conveyor stability, drying time, and control-panel simplicity. Automatic adjustment can reduce waste, but complicated software may slow new operators. That is an uncomfortable trade-off. A cheaper unit may also demand more maintenance than expected. Request records for spare parts, service response, warranty coverage, and adhesive compatibility.
Do not choose by speed alone. Measure usable output after setup, cleaning, rejected cartons, and short production pauses. A reliable Paper Box Glue Spraying Machine should fit your workflow, not merely impress during a showroom test. Some buyers overlook noise, floor space, and cleaning access. Later, those details become daily frustrations. The best choice balances precision, durability, safety, energy use, and realistic production needs. Test carefully. Ask difficult questions. Your future operators will notice the difference.
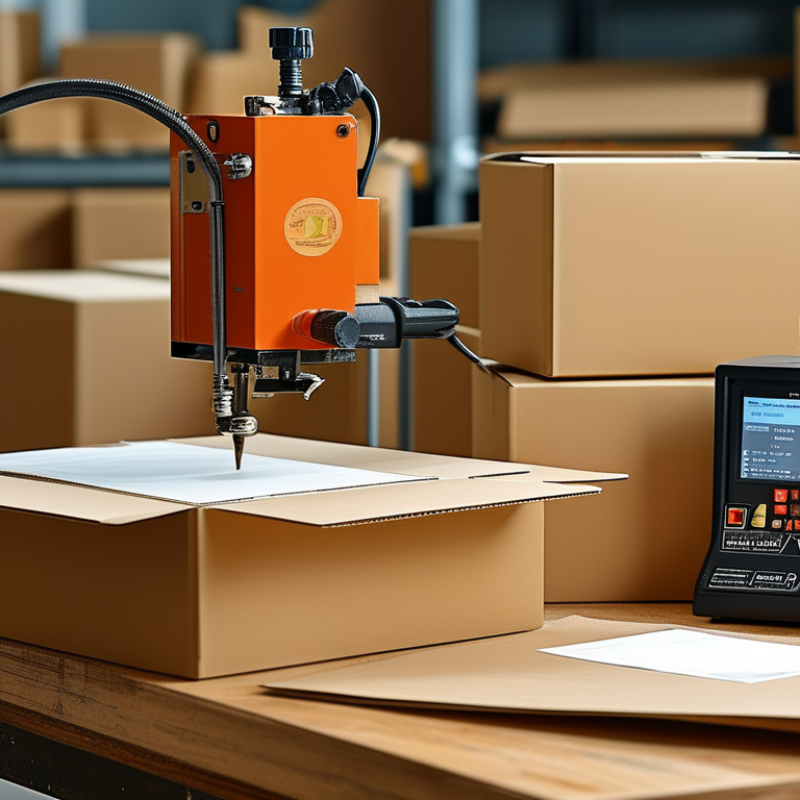
Choosing a paper box glue spraying machine starts with the board, not the advertised speed. Record board type, thickness, coating, moisture, and flute profile. A machine handling 0.3 mm stock may struggle with 1.5 mm board. Coated surfaces can reduce glue wetting. Ask for a documented working range, not a broad sales claim. During production trials, I check nozzle stability after several hours. Small pauses reveal problems that short demonstrations hide.
Measure blank length, width, fold depth, flap width, and glue-line position. Confirm that the feeder supports both your smallest and largest formats. Narrow flaps need accurate registration. Large cartons need stronger transport control. At 60 m/min, basic synchronization may be enough. At 300 m/min, encoder feedback, stable pressure, and fast fault response become critical. Do not size the machine only for average speed. Leave capacity for acceleration, format changes, and uneven board batches.
Request trials using actual blanks, adhesive, and line settings. Record glue weight, line width, overspray, bond strength, and waste at each speed. Check access to nozzles and cleaning points. Difficult service areas increase production delays. I would also test restart performance after a brief stop. It is easy to overlook. Supplier data may not match floor conditions, especially with dust or temperature changes. A careful trial can expose weak assumptions before installation.
How to Choose a Paper Box Glue Spraying Machine in 2026?
Match Glue Systems to Adhesives: 500–5,000 mPa·s Viscosity Compatibility
Choosing a paper box glue spraying machine in 2026 starts with viscosity, not advertised speed. Adhesives between 500 and 5,000 mPa·s behave very differently. A 500 mPa·s dispersion may atomize through a smaller nozzle at moderate pressure. A 5,000 mPa·s formulation may need a larger passage, stronger pump, or controlled heating. I check viscosity at the actual production temperature. Room-temperature readings can mislead operators.
Machine selection should match pump displacement, hose diameter, nozzle design, and control range. Lower-viscosity glue can create mist, overspray, and uneven wetting under excessive pressure. Thicker adhesive may pulse, clog, or leave heavy beads without enough torque. During testing, I measure coating width, glue weight, and open time on real paperboard. I also inspect folded cartons after curing. A clean line is not always a strong bond.
Tips: Request a viscosity chart before purchase. Test at 500, 2,500, and 5,000 mPa·s when formulations vary. Keep filters accessible. Confirm stable heating control for temperature-sensitive adhesives. Ask about flushing procedures and spare nozzles. I once trusted a wide viscosity claim without checking shear sensitivity. Production later revealed inconsistent spray patterns. That mistake was avoidable. Leave adjustment room, not just maximum capacity.
| Adhesive Viscosity at Operating Temperature | Typical Adhesive Formulation | Recommended Glue Delivery System | Metering or Pump Arrangement | Practical Nozzle / Orifice Starting Range | Typical Fluid Pressure Starting Range | Heating Requirement | Recommended Application Pattern | Suitable Paper Box Applications | Key Selection Checks |
|---|---|---|---|---|---|---|---|---|---|
| 500–800 mPa·s | Low-to-medium viscosity water-based PVA or dextrin adhesive | Air-assisted spray | Diaphragm or low-pulsation gear pump with adjustable flow control | 0.5–0.8 mm | 1.5–3.0 bar | Usually not required; keep the adhesive within the supplier’s specified temperature range | Fine, narrow bead or light mist with controlled overlap | Folding cartons, light paperboard, small side-seam areas | Check overspray control, atomizing-air stability, filter size, and minimum controllable flow |
| 800–1,200 mPa·s | Standard water-based PVA, dextrin, or modified-starch adhesive | Air-assisted bead or spray | Progressive-cavity, diaphragm, or precision gear pump | 0.6–1.0 mm | 2.0–4.0 bar | Optional low-temperature conditioning for consistent flow | Continuous bead, short intermittent bead, or narrow fan spray | General folding cartons, corrugated sleeves, paper bags | Choose a pump with low pulsation and a positive shut-off valve to prevent stringing |
| 1,200–2,000 mPa·s | High-solids PVA, dextrin, starch blend, or filled water-based adhesive | Pressure-fed bead system | Progressive-cavity or precision gear pump; use a pressurized reservoir for stable supply | 0.8–1.2 mm | 3.0–5.0 bar | Optional jacket or hopper warming, commonly around 25–40°C when permitted by the adhesive specification | Defined bead or controlled curtain; avoid excessive atomization | Heavy paperboard cartons, rigid box wraps, laminated paper structures | Verify shear sensitivity, solids content, filter capacity, hose diameter, and cleaning access |
| 2,000–3,000 mPa·s | Thick PVA, dextrin, starch-based, or water-based adhesive with higher solids | Positive-displacement bead application | Progressive-cavity or robust gear pump with a short, large-diameter fluid path | 1.0–1.5 mm | 4.0–6.0 bar | Often beneficial; use controlled warming only if approved for the adhesive | Continuous bead, segmented bead, or wide low-pressure stripe | Rigid setup boxes, thick board, large-area side seams | Prioritize torque capacity, pressure relief, anti-drip shut-off, and easy flushing |
| 3,000–4,000 mPa·s | Very high-solids water-based adhesive, thick dextrin, or heavily modified starch adhesive | Heated or conditioned bead system | Progressive-cavity pump or high-torque gear pump with pressure monitoring | 1.2–1.8 mm | 5.0–7.0 bar | Frequently required for stable metering; use temperature feedback and insulated lines | Large, slow-moving bead rather than atomized spray | Heavy-duty cartons, rigid paperboard cases, specialty packaging | Confirm maximum allowable temperature, pump seal compatibility, dwell time, and nozzle-cleaning procedure |
| 4,000–5,000 mPa·s | Extremely viscous water-based adhesive or hot-applied adhesive measured at its process temperature | High-pressure precision bead system | High-torque progressive-cavity or precision gear pump with a heated, recirculating supply circuit | 1.5–2.2 mm | 6.0–8.0 bar | Normally required for consistent flow; temperature must remain within the adhesive supplier’s safe operating range | Thick continuous bead, segmented bead, or controlled stripe; atomizing spray is generally unsuitable | Heavy rigid boxes, thick board laminations, high-bond-strength seams | Use pressure relief, heated hoses where approved, temperature interlocks, and a nozzle sized to prevent excessive back pressure |
In 2026, choosing a paper box glue spraying machine should begin with placement accuracy, not output speed. A nozzle that misses the flap by 2 mm can leave wet edges, weak corners, or visible stains. Ask suppliers for measured results across the full box format, not one ideal sample. Target a consistent ±1 mm spray position during repeated runs. Use printed registration marks and a steel ruler to check the first 50 boxes. Small details matter.
Spray precision depends on nozzle control, conveyor stability, glue viscosity, and paper dust. Test the machine after four hours, when heat and residue may change the pattern. Inspect narrow lines on folding flaps, curved corners, and overlapping joints. A camera or inspection light can reveal mist outside the bonding area.
Compare glue use by weighing a sealed cartridge before and after a fixed batch. Well-tuned systems may reduce consumption by 10–30%, but that figure is not guaranteed. Thinner application can save material and still fail if pressure is unstable.
Request a trial with your actual paper, coating, and adhesive. Record line width, placement deviation, reject rate, and glue usage per box. Repeat the test at low, medium, and high speeds. Fast settings often expose weak control. Do not trust a single successful shift. Operators should adjust pressure and timing without complicated tools. A blocked nozzle can waste more glue than imperfect calibration. The best setting may change with humidity, board stiffness, and production volume.
How to Choose a Paper Box Glue Spraying Machine in 2026?
Automation should be judged during real production, not only through a sales demonstration. A PLC control system can coordinate glue pumps, conveyor speed, sensors, and safety stops. Ask operators to load two different box sizes and switch between them. Watch every adjustment.
The changeover should take under 15 minutes. That target matters when orders change frequently. Check whether guides have clear scales, tool-free locks, and stored PLC recipes. A practical machine should recall settings for carton width, spray timing, glue volume, and conveyor speed. Labels help. Confusing screens slow everyone down.
During a factory trial, time the process from the last finished box to the first acceptable box. Include nozzle cleaning and a short dry run. The first result may look acceptable but fail under faster output. Inspect glue lines on narrow flaps, corners, and recycled board. Uneven coating often reveals poor pressure control or delayed valve response.
I once focused too much on touchscreen functions and overlooked physical access around the nozzles. That was a costly lesson. Operators need quick access for cleaning, while guards must remain secure during operation. Review alarm records, maintenance instructions, and training requirements before purchase. A reliable supplier should explain PLC backups and provide measurable setup data, not vague promises.
How to Choose a Paper Box Glue Spraying Machine in 2026?
A reliable machine must prove safety before showing production speed. Ask for the CE Declaration of Conformity, risk assessment, manuals, and electrical test records. CE is not a quality badge by itself. Check whether the machine follows EN 60204-1 for electrical equipment and control systems. Inspect emergency stops, guards, wiring labels, and grounding during a factory visit. A clean control cabinet tells you more than a polished brochure.
Total cost includes more than the purchase price. Measure glue use, compressed air demand, electricity, cleaning time, spare parts, and operator training. Request an energy test using your actual box sizes and production speed. Calculate ROI from reduced glue waste, fewer rejects, and saved labor hours. A simple payback model can expose unrealistic promises. I once focused too heavily on output speed. Maintenance downtime later weakened the expected return. That mistake still influences my equipment checks.
Tips: Compare three-year ownership costs, not quotations alone. Ask how quickly common nozzles, filters, and sensors can be replaced. Check whether technicians can access parts without removing major covers. Record energy readings during a normal shift. Review warranty exclusions carefully. If the supplier avoids maintenance data, pause the purchase. A cheaper machine may become expensive after six months.
Verify safety and total cost through CE documentation, EN 60204-1 compliance, energy consumption, maintenance requirements, and five-year ROI.
Request the EU Declaration of Conformity, CE marking evidence, risk assessment, guarding details, emergency-stop design, and electrical documentation aligned with EN 60204-1.
Energy cost is calculated from rated power × 2,000 operating hours per year × €0.20/kWh. Confirm actual duty cycle and standby consumption with the supplier.
Five-year total cost includes acquisition, electricity, and scheduled maintenance. Validate spare-parts prices, service intervals, downtime, and throughput before calculating ROI.
Planning model using transparent assumptions rather than brand data: EUR currency, five-year ownership period, 2,000 operating hours per year, and €0.20/kWh electricity. Replace the modeled inputs with supplier quotations before purchasing.
We are here to help you with all your queries and concerns, just write to us using the below form and we will get back to you as soon as we can.